
Let us flip. Let us bounce off walls. Let Us Drone.
It’s a giant bee. It’s an adolescent Spark. It’s a…Tello? What’s the most fun you can have with $99 and a smartphone? Who knows, but the Tello has gotta be up there! So what is a “Tello”? The Tello is a tiny drone made by Ryze Robotics, a tech startup established in 2017. “Trevor, you claim this is a blog about DJI, what gives?”. I’m glad you asked. The Tello uses DJI and Intel (14 core processor) flight technology which is what makes this aircraft truly special in the sub $100 category of the consumer drone market. I was fortunate enough to get my hands on one before they started shipping to the USA in March 2018, so let’s dive into my honest hands-on review of the new Tello.
Pros
Pros
- Extremely lightweight
- Advanced technology for the price point
- DJI flair
- One of the longest flight times in this category
- Well built and durable
Cons
Cons
- Struggles outdoors
- Does not come with transmitter
- Often intermittent Wi-Fi connectivity
- Short range
- Loss of VPS in low light conditions
Click here to pick up a Tello from the DJI store.
Quick Look
- Dimensions: 98×92.5×41 mm
Weight: 80 g
Propellers: 3 in - Max speed- 8.9 mph (slow mode), 17.8 mph (fast mode)
- Max range- 100 meters (I only got about 60-70 meters in an open field)
- Max altitude- 32 feet
- Flight time- 13 minutes (I averaged just under 11 minutes)
- Charge time- 1.5 hours (I got a full charge in 1 hour and 11 minutes)
- DJI flight tech
- Intel 14 core processor
- 5 MP stills
- 720p video
First Impressions
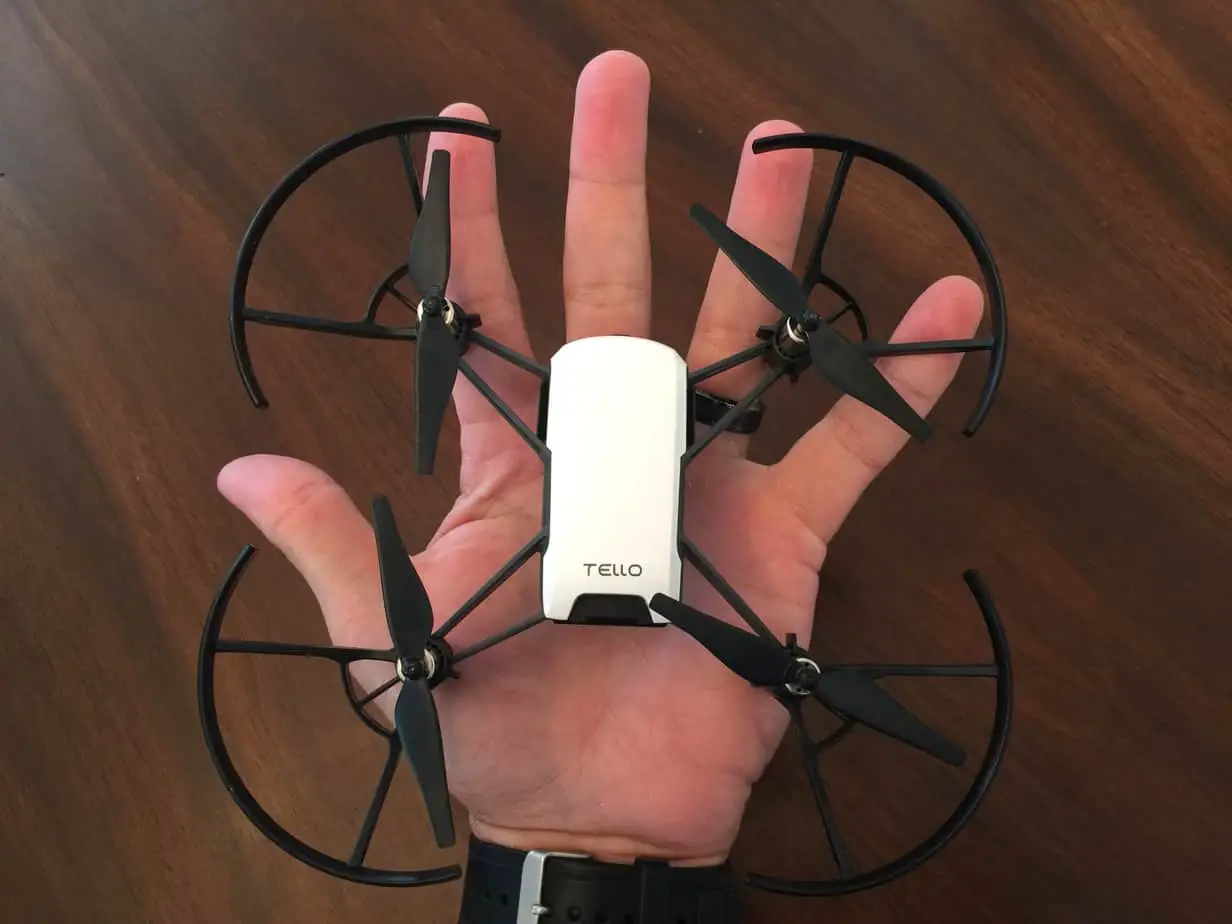
Before commencing the unboxing, I had a fleeting thought that they had forgotten to include the drone. The absence of weight was disconcerting. Upon removal of the box from the delivery carriers packaging, I was delighted to see that a prank was not pulled and I had one very light quadcopter in my hands. So how tiny is tiny?
Dimensions: 98×92.5×41 mm
Weight: 80 g
Propellers: 3 in
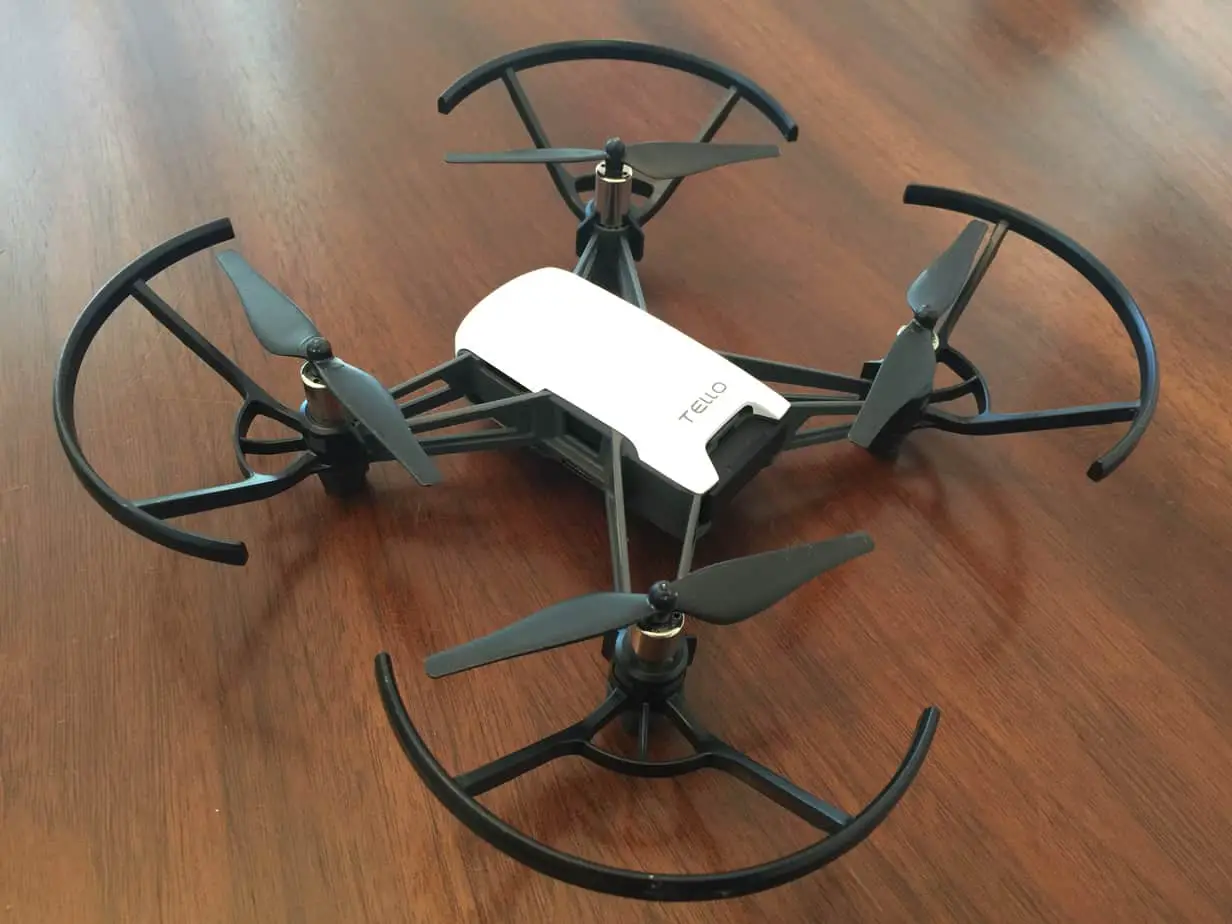
After removing the drone and accessories from the box, I proceeded to stare at the Tello for a few minutes. Once all sides had been thoroughly inspected and a few choice flicks were given, I had a first impression. It was definitely a toy, but a well-built one. Its ultra-light body and abundance of plastic resonated with the words “entry level”, but I did not for a second feel that pieces would start popping off if roughly handled. The propeller guards are made of fairly rigid plastic and come pre-installed. Some comparable drones that I own have such thin propeller guards that they are almost moldable. The Tello’s are firmly attached and do not change shape with a little finger prying. As I made my way around the drone I noticed a micro USB port on the left side where the battery would receive a charge. Although this prevents charging multiple batteries simultaneously or charging battery number one while you're flying with battery number two, it's nice that I would later be able to simply plug a USB cable into my portable power bank for a charge while at the park. Working to the aft end of the aircraft, I practiced inserting and removing the battery which was a fairly intuitive process. Once inserted, the battery fits snug and does not give me the impression that it'll fall out with aggressive aerial maneuvers. On the right side of the Tello is a power button which was a little small for my big finger but easily accessible. Four rubberized landing tips keep the drone firmly planted while not in flight. Here’s what’s included in the box:
Tello (1)
Propellers (4)
Propeller Guards Set (1)
Battery (1)
Propeller Removal Tool (1)
For it's price point, I would say that the Tello is at or near the top of the line when speaking to its look and feel.

First Flight
Did I read the manual or at the very least charge the battery before sending the little humming-bird up in my house? Of course not. You as the reader deserves an example of a real-life scenario when you irresponsibly launch the drone without first taking the precursory steps to ensure a successful maiden voyage.
When initially launching the Tello app on my iPhone, I was prompted to “press the power button on the side to start the aircraft”. Tapping “connect Tello” on the bottom righthand corner of the screen will open your Wi-Fi settings where “Tello” will be listed amongst the available networks. Once connected, I returned to the app where the 720p vision feed filled the screen with two virtual joysticks. Thanks to a mostly depleted battery, my first flight lasted all of two minutes. I took advantage of the one hour and eleven minutes it took the Tello to receive a complete charge by browsing through the straightforward instructional manual. A blinking blue light on the front of the drone indicates that the battery is charging, with the light becoming a solid blue when charging is complete. With a full charge, I set out on an exploratory aerial tour of my house, occasionally bouncing off a wall here and there. Thanks to DJI’s Vision Positioning System, the Tello remained remarkably stable while frequently making small self-corrections. The first in-flight message I received was a “low ambient light” warning as I flew into a dimly lit hallway. Curious to see what would happen, I proceeded to fly down the increasingly dark hallway. My answer came in the form of warning number two which read “Vision Positioning System lost”, and the Tello began to drift as DJI drones do when in Attitude mode. Turn on lights. Noted. Finding myself on the couch after completing the tour, it was time to see how well I could navigate through the house while I remained stationary. Rounding the first corner caused an instant two bar Wi-Fi drop, with the remaining bars being lost after flying another five feet or so. I was able to still control the drone but the image transmission was lost, and I was able to fly backward until the live image feed resumed.
It's worth noting that Tello's flight options can be programmed with Scratch, an MIT program that is intended to teach individuals the basics of coding. I have not attempted to use Scratch, but I look forward to giving it a shot in the future. Additionally, Tello is compatible with select VR headsets, which I have not a chance to test yet.
What DJI & Ryze Don't Tell You
Over the next couple of weeks I crashed (multiple times), flew outside, tested each flight mode and got the little guy stuck in a tree. To my delight, the Tello remains solid with all original parts intact. So what are some crucial bits of information that aren't advertised by DJI or Ryze?
The promo video for the Tello shows the drone flying effortlessly outdoors, which is a bit misleading. You may choose between slow (up to 8.9 mph) and fast (up to 17.8 mph) modes during flight, and I was forced to remain in the faster mode while flying into a headwind of 3-5 mph. One day we had winds between 10-15 mph and I decided that it would be unwise to fly my new and currently difficult to acquire drone in such winds. Logic and reason silenced, I slid my finger over “slide to takeoff” and was airborne. What I had not known up to this point in time was that the Tello took a few seconds for the Vision Positioning System to work once launched (indicator light will repeatedly blink green twice when VPS is active). Immediately after taking off the quadcopter was carried in a SE direction at, well, 10-15 mph. I quickly realized the Tello was not able to get a lock with the VPS while traveling at that speed. Knowing that I had a quoted max range of about 100 meters, I jogged after the flyaway drone as to ensure connectivity was not lost until I was able to descend in altitude and eventually land. Once heavy breathing subsided, I tried it again to make sure the first attempt wasn't a fluke; sure enough, the Tello was again carried by the wind in the same direction at the same speed. For my third attempt, I patiently waited for the wind to die down and seized the moment when it did. Now, with the VPS working, I was actually impressed by how steady the Tello was with the windy conditions. Sure, the VPS was making all kinds of small, rapid stabilization adjustments, but its current position was maintained quite well and I was able to carefully fly around near me while in fast mode.

Additionally, I struggled with Wi-Fi connectivity on a couple of occasions while flying outdoors. The first was when I tested out the max flight altitude, which the manual claims to be 32 feet. I ascended to about that altitude and completely lost connection with the drone. If I had not been able to reconnect by standing on my tippy toes with a skyward stretched arm I suppose the Tello would have eventually used it’s autoland feature when the battery got low enough. Was it my fault that the Tello disconnected? Yea, probably, but a feature to have the drone automatically descend five feet of so after losing connection around thirty feet up would be nice. The second loss of connectivity was unexplained and unfortunate. While flying outside in “fast mode” with the Tello about thirty feet away from me at around ten feet of altitude I lost connection with the drone. Despite quick, panicked attempts to press harder on my phone screen (as if increased finger pressure was the key to connectivity) I helplessly watched my new Tello fly into a nearby tree at full speed. Fortunately, the quadcopter hit the branches/leaves and the only thing damaged during its retrieval was my knee. Maybe there was something nearby that caused interference with the Wi-Fi? I couldn't help but notice that on multiple occasions my phone would show no Wi-Fi bars but I still had control of the drone.
The darn delay. Back around 2010, I bought a remote-controlled helicopter that did not come with a remote controller. In bright colorful letting were the words “Fly with your smartphone!”, how awesome was that? Or at least I thought it was awesome until it was time to actually fly the thing. Poor connectivity, terrible range, lack of tactile feedback and the darn delay that is often a side effect of controlling devices using Wi-Fi resulted in a helicopter that was ahead of its time in technology but behind the times in usability. Unfortunately, the Tello shares some similar pitfalls. The lack of tactile feedback and the delay being the biggest. I found myself looking down at the screen every few seconds to see where my thumbs were in relation to the virtual joysticks, and because of the delay, I learned to make adjustments to the aircraft's position a second or two before I generally would in order to accommodate for the lack of responsiveness. The release of the remote controller for the Spark made a lot of owners very, very happy. Although I did not have one in my possession, DJI claims there are select Bluetooth RC's that are compatible with the Tello, which I very much look forward to trying out.
Regarding landing, there are essentially four cues that will cause the Tello to land. 1) At 8% battery life my Tello commenced its auto land process, which is similar to the actions of DJI drones. Hitting “STOP” in the bottom left-hand corner, I waited to see how low the battery would get before I had a free-falling quadcopter. This happened at 1% and fortunately, I was only a foot off the ground. 2) You can make the Tello land at any time by tapping the auto land icon, which I found myself using most of the time because of consistent positive results. 3) If you slide and hold down the left virtual joystick, the Tello will land after hovering about a foot off the ground for a couple of seconds. I found that I had to repeat these steps sometimes as the Tello would not land on the first or second attempts. 4) Like the Spark, the Tello features PalmLand which I was excited about. Excitement waned with each unsuccessful attempt. Fortunately, I got the hang of it. What I learned is that there needs to be nothing beneath the Tello until the five-second countdown begins; at which time the Tello will gladly land in an open, waiting palm.
Flight Modes
As many of us know, intelligent flight modes are a staple in the $400 plus drone market. They allow us to capture that perfect shot by autonomously maintaining a set course at a constant speed or locking onto a moving object with a single tap on the screen. I won’t say that Tello’s flight modes aren’t intelligent, but to not call them introductory would be doing a disservice to the prospective buyer. To use any of the intelligent flight modes the aircraft’s battery level must be at least 50%. Here’s a quick description of each:
- Bounce mode- Tello literally bounces (flies) up and down above a surface. Not exactly sure what this could be used for besides making your spouse, kid or dog nod in agreement when you’ve asked them a question.
- Throw & Go- After selecting this intelligent flight mode from the menu a timer will begin and you have five seconds to gently toss the drone up in the air from your flat palm. I will say that I found myself using this flight mode the most out of the five.
- 8D flips- Just as the name implies, the Tello will flip in eight different directions. Kinda cool.
- EZ Shots-
- 360- Once selected, the Tello will start recording video and automatically rotate 360 degrees. Upon completing one 360 rotation, the Tello will hover in place. While experimenting with this flight mode, I noticed that the speed at which the drone rotated was not as constant as I would have liked it to be, as it would have moments of acceleration followed by deceleration.
- Circle: Like 360, the Tello will automatically begin recording video when Circle mode is selected, and the drone will make one complete circle around an arbitrary spot approximately seven feet in front of the drone. This flight mode reminds me of the Point of Interest mode that higher priced DJI drones come equipped with, just without the customization capabilities. Additionally, the video's recorded while in Circle mode were less jumpy than the ones taken in 360 mode.
- Up & Away- The infamous fadeaway shot. After selecting this mode, the Tello will automatically begin recording video while flying up and away from you. If you happen to randomly be near a beautiful cliff and the Tello is the only piece of flying equipment at your immediate disposal, then a 720p fade away video of you and your dog would sure be better than an iPhone selfie taken with an outstretched arm. That is, of course, assuming that there is very, very little wind.
Speaking of wind, the Tello will not allow you to use any of the intelligent flight modes if there is too much wind. How much is too much? I'm not sure and I didn't see a number in the instructional manual but a warning message will be displayed on your screen if this is the case.
Smile for the camera. Or not.
I’m not being a poor sport, I’m just saying that the 5-megapixel camera won’t be able to capture the difference between a smile and a frown from more than a few feet away. We’re taken back to 2007 when slider phones ruled the land with the quality of these stills. I digress, this is a $99 drone after all whose aim is to teach beginners the fundamentals of flying a quadcopter. Or for the antsy pilots located in areas of inclement weather that need to scratch that itch by flying indoors until warmer temperatures prevail. The video is recorded at 720p. It is worth noting that the Tello comes equipped with electronic image stabilization, but the absence of a gimbal makes adjusting the camera angle an entire drone movement. Video and stills are formatted in JPG and MP4 respectively and are stored to the smart devices internal storage.
Price of Tello
For $99 you get a very capable entry-level drone. Additional batteries (highly recommended) are listed at $19 on DJI’s website and if white is too boring then pick up one of the $3 blue or yellow snap-on body shells. Although not currently available on DJI’s website, I would recommend purchasing a carrying case of some sort, as the thin plastic box in which the Tello comes has “temporary” written all over it.
Trevor’s Take
I honestly feel that I would be doing a disservice if I were to dissuade anyone from buying the $99 Tello. For the newbie who wants to test the waters but isn't sure he/she wants to shell out a minimum of $400 on a DJI drone, the Tello couldn't be a better starter quadcopter. Who knows, there may be a better drone out there at a similar price point but getting familiar with Tello's DJI-like user interface is worth a lot in my book. I'd say it's safe to say that DJI is currently dominating the consumer drone market, so when that newbie decides to upgrade it'll be a smooth transition. And for the enthusiast who already has an arsenal of sUAV's; flying through your house or work while taunting kids and coworkers would likely cause a smile that would have otherwise been a tight-lipped furrowed brow if it was $399+ instead of 99$ that was flying down the narrow hallway. So get out there, put a smile on your face, and pick up a Tello…or the other way around. Let me know what you think about the Tello and subscribe to my newsletter for the latest updates and reviews!
Click here to pickup a Tello from the DJI store.
Disclosure: This post may contain affiliate links, for which I receive a small commission. Buying from a link on this website won't cost you a penny more, it just keeps this blog “soaring“!

Tello box
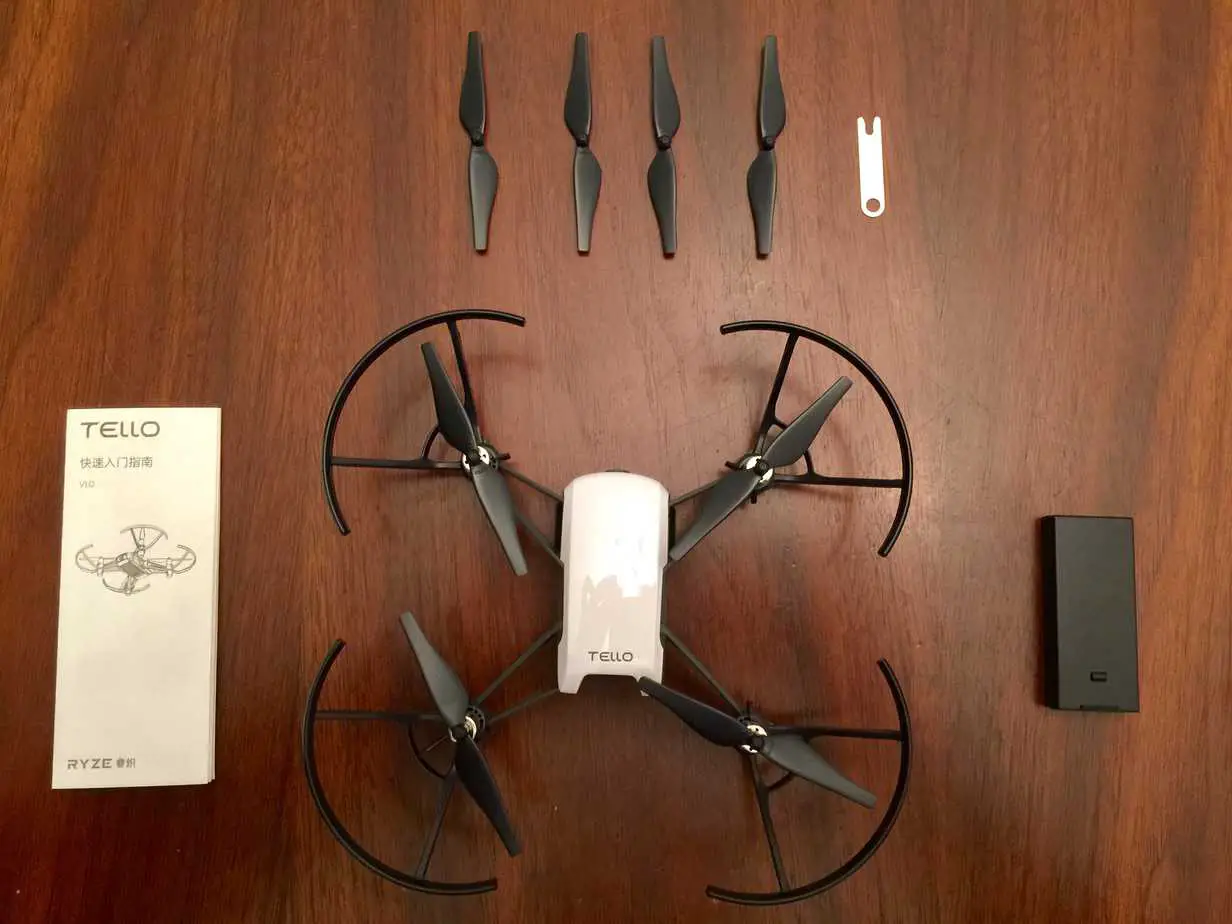
What come in the box
Top view
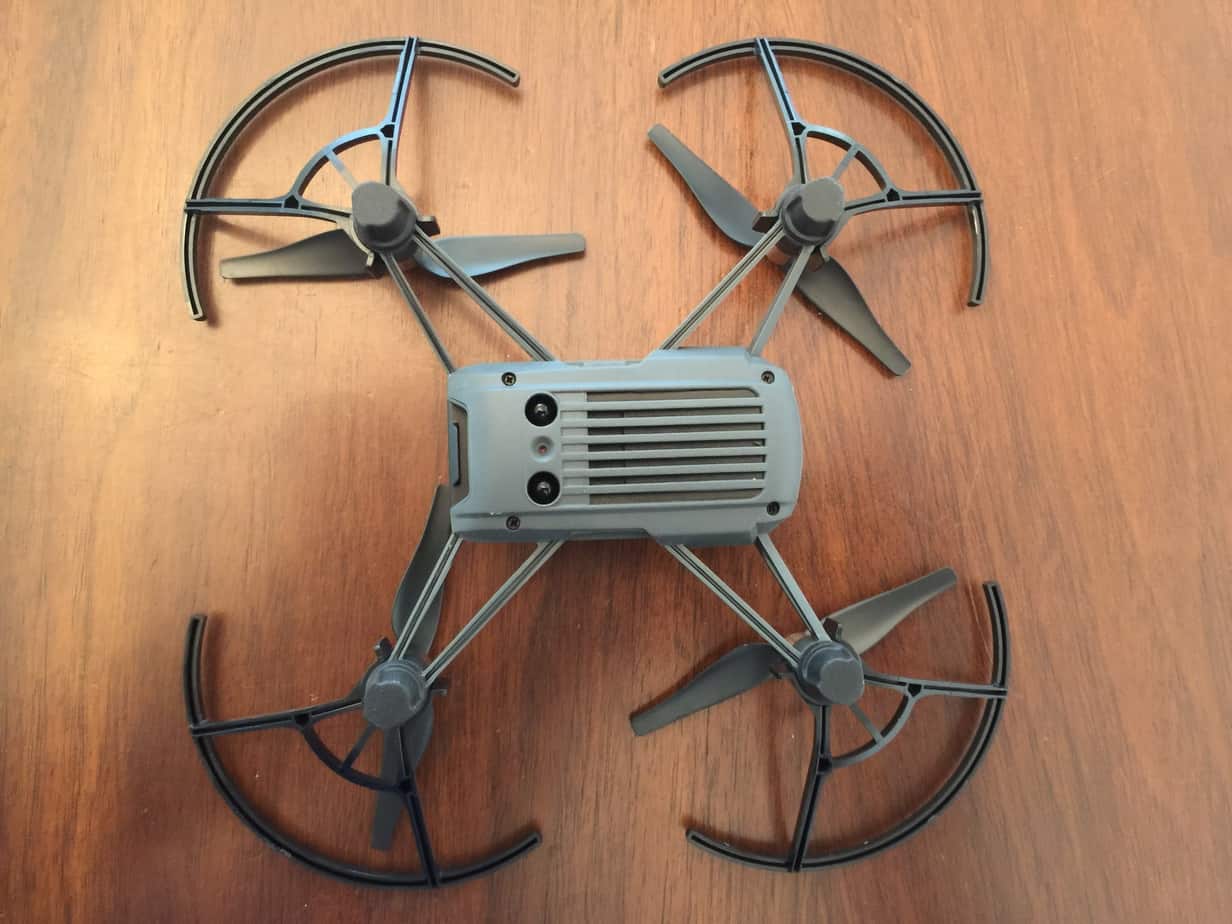
Bottom view
Front view
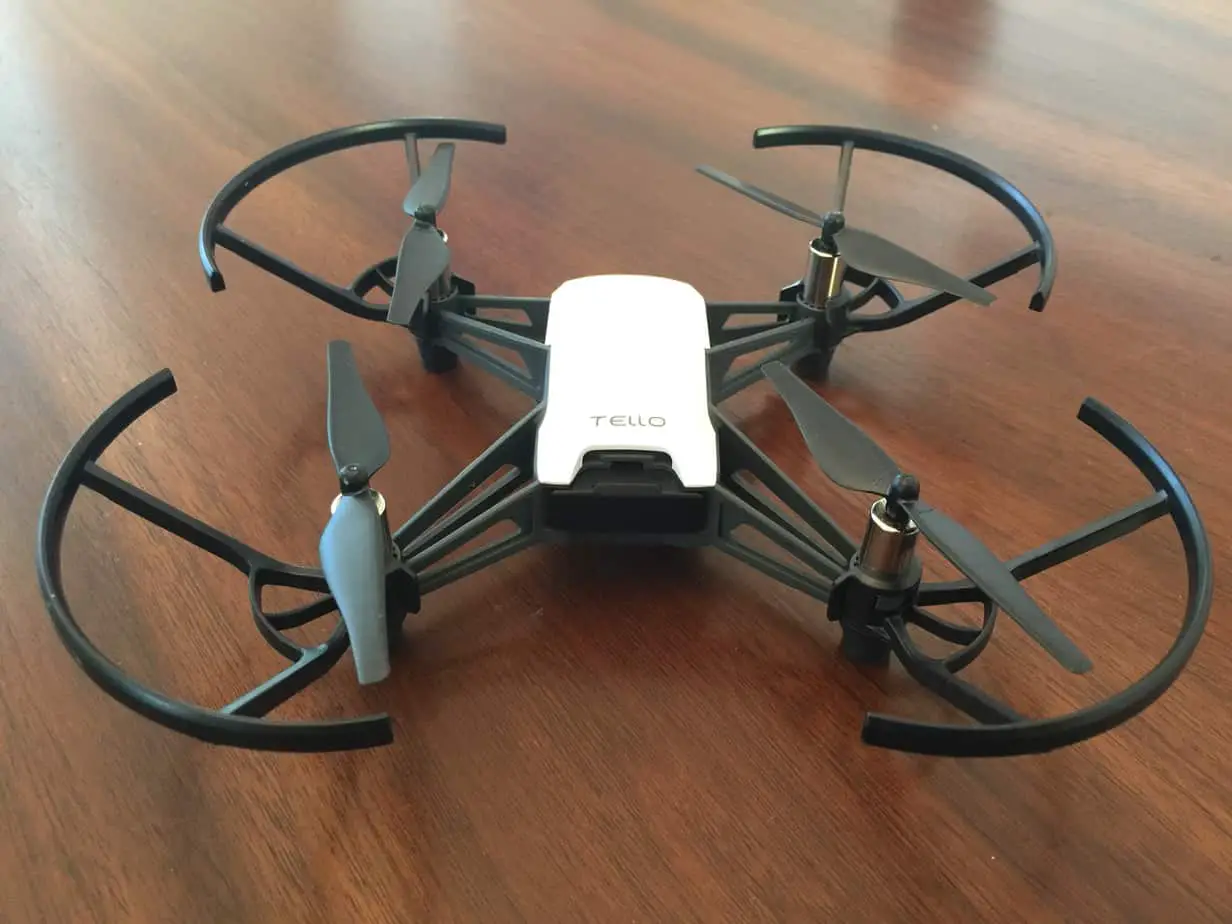
Angled side view
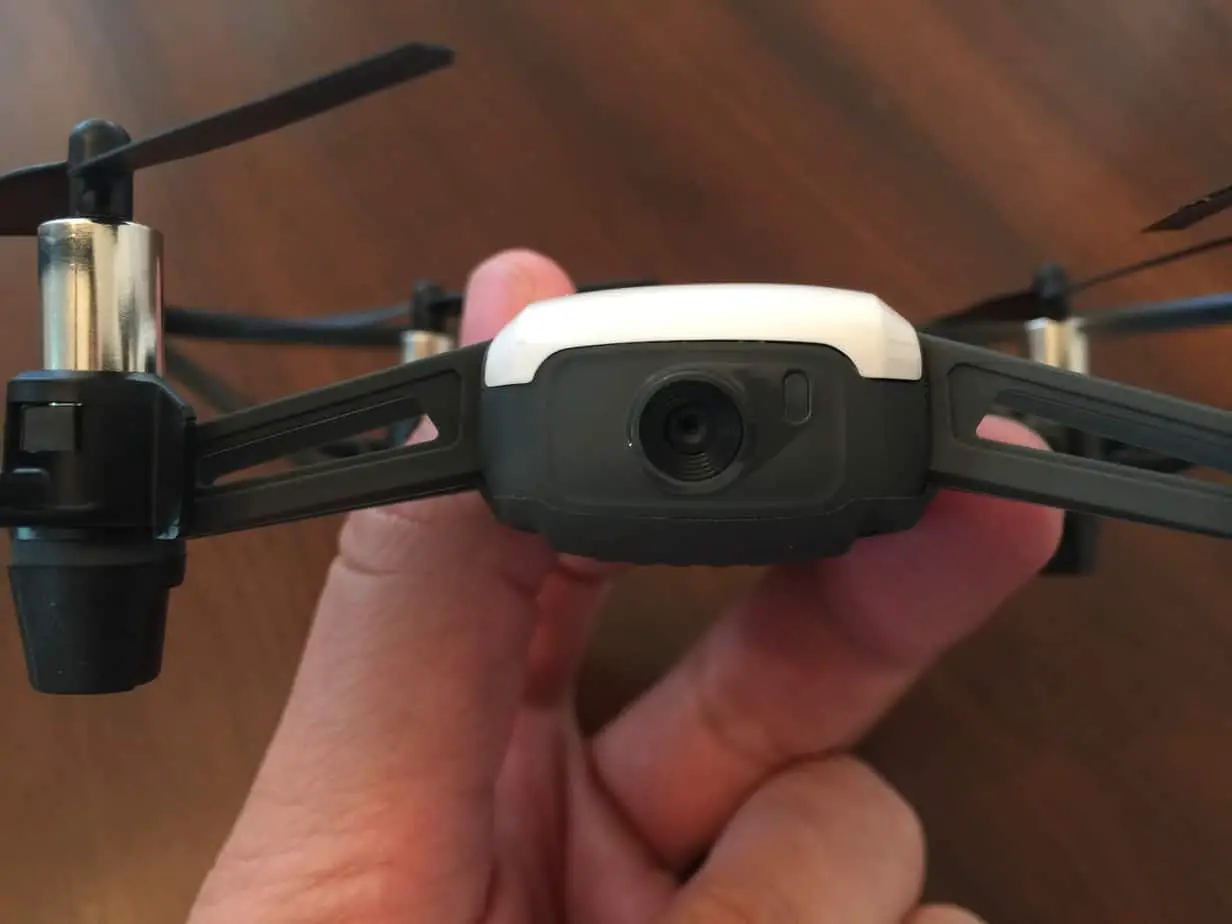
Camera
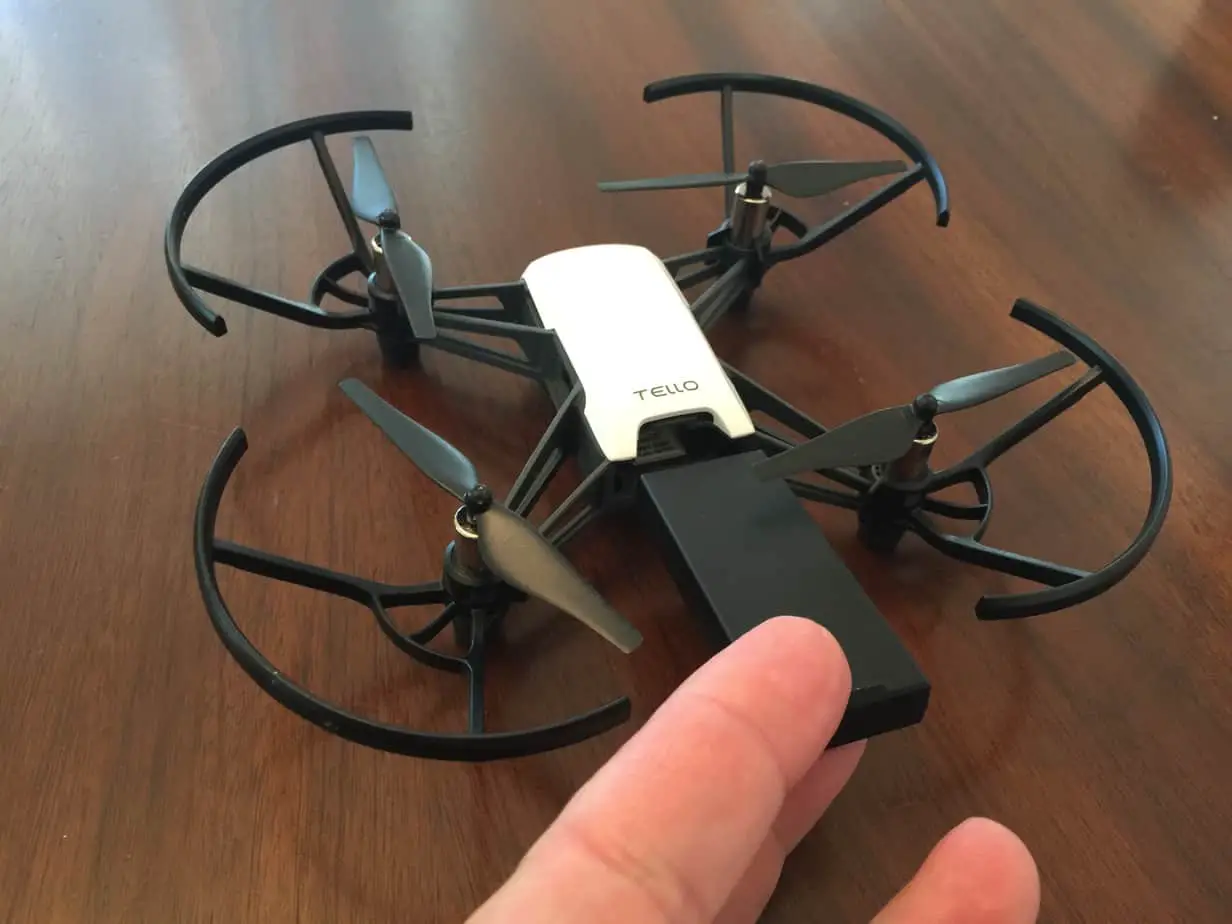
Battery
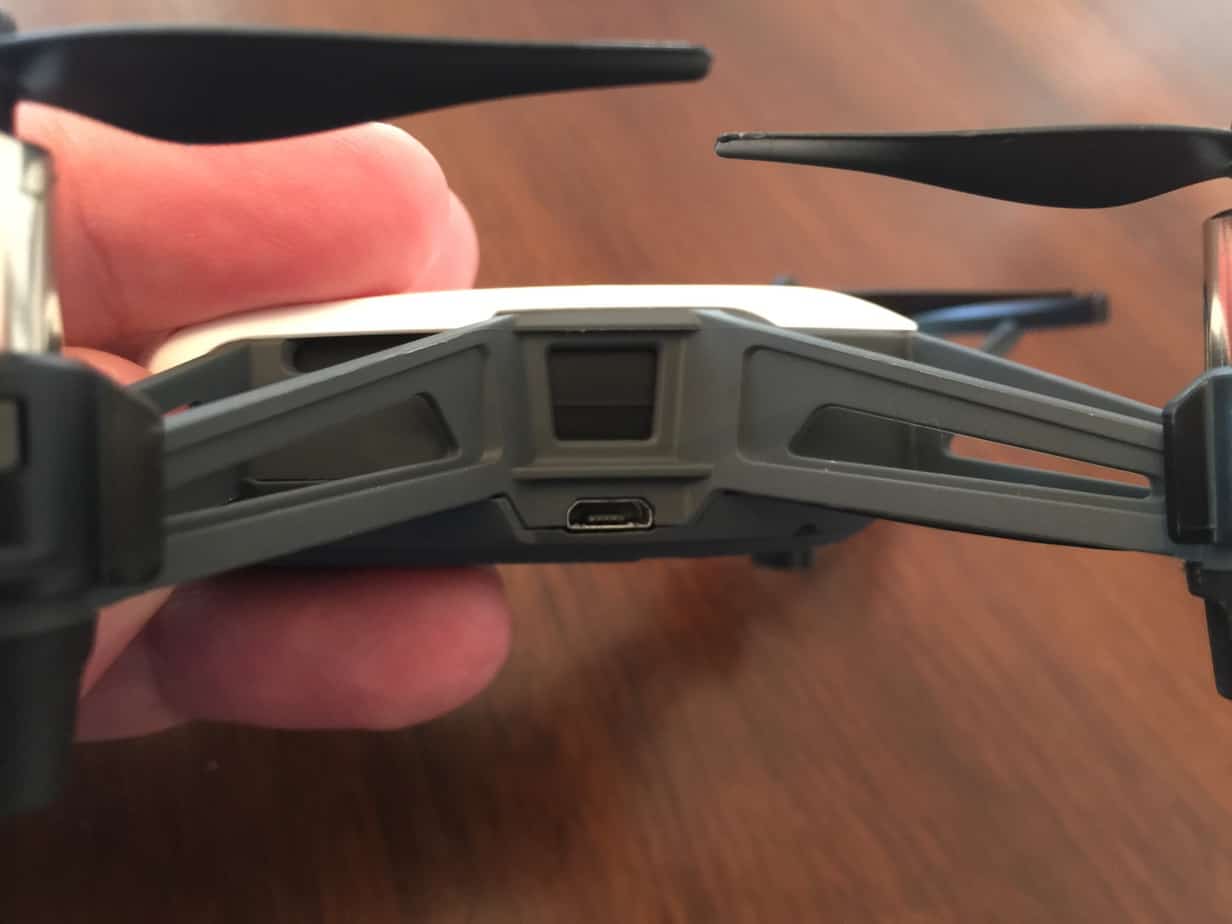
Charging port

Propeller
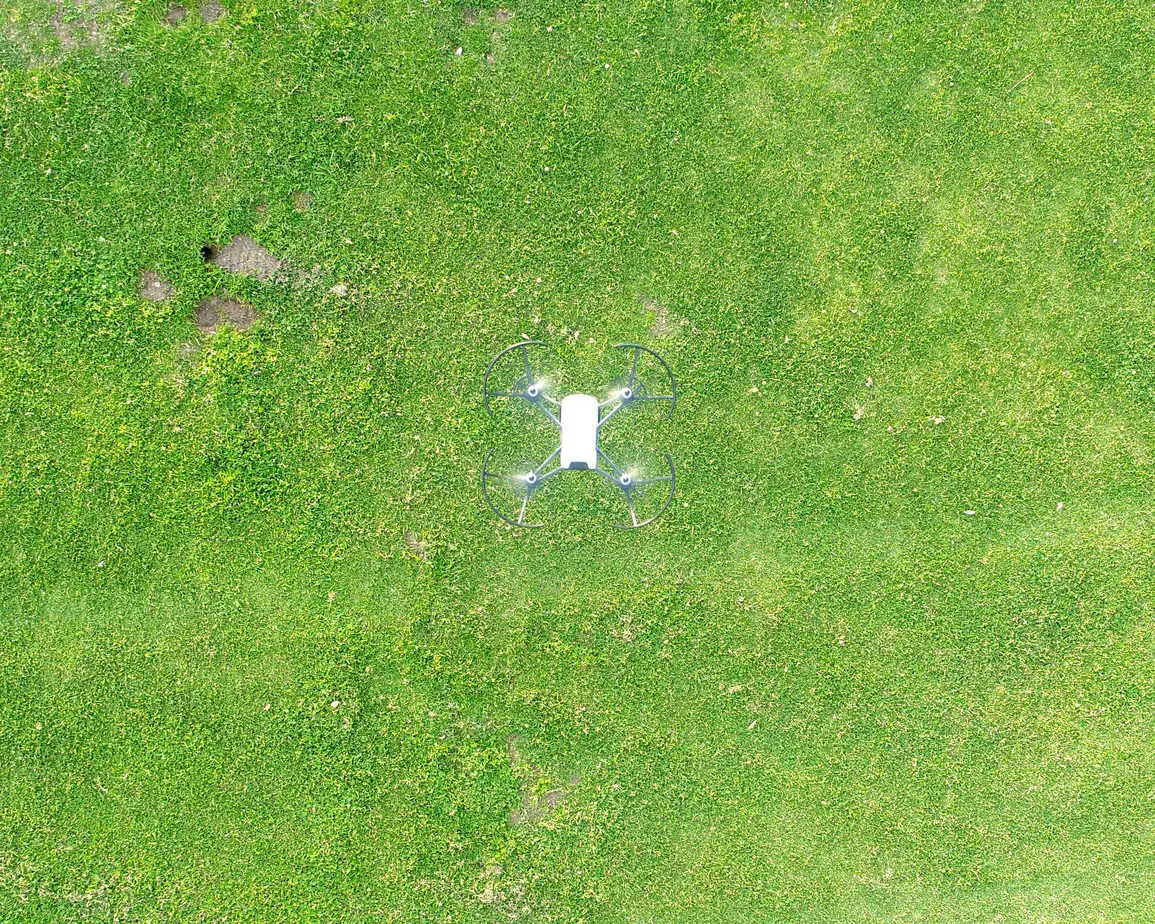
Aerial view
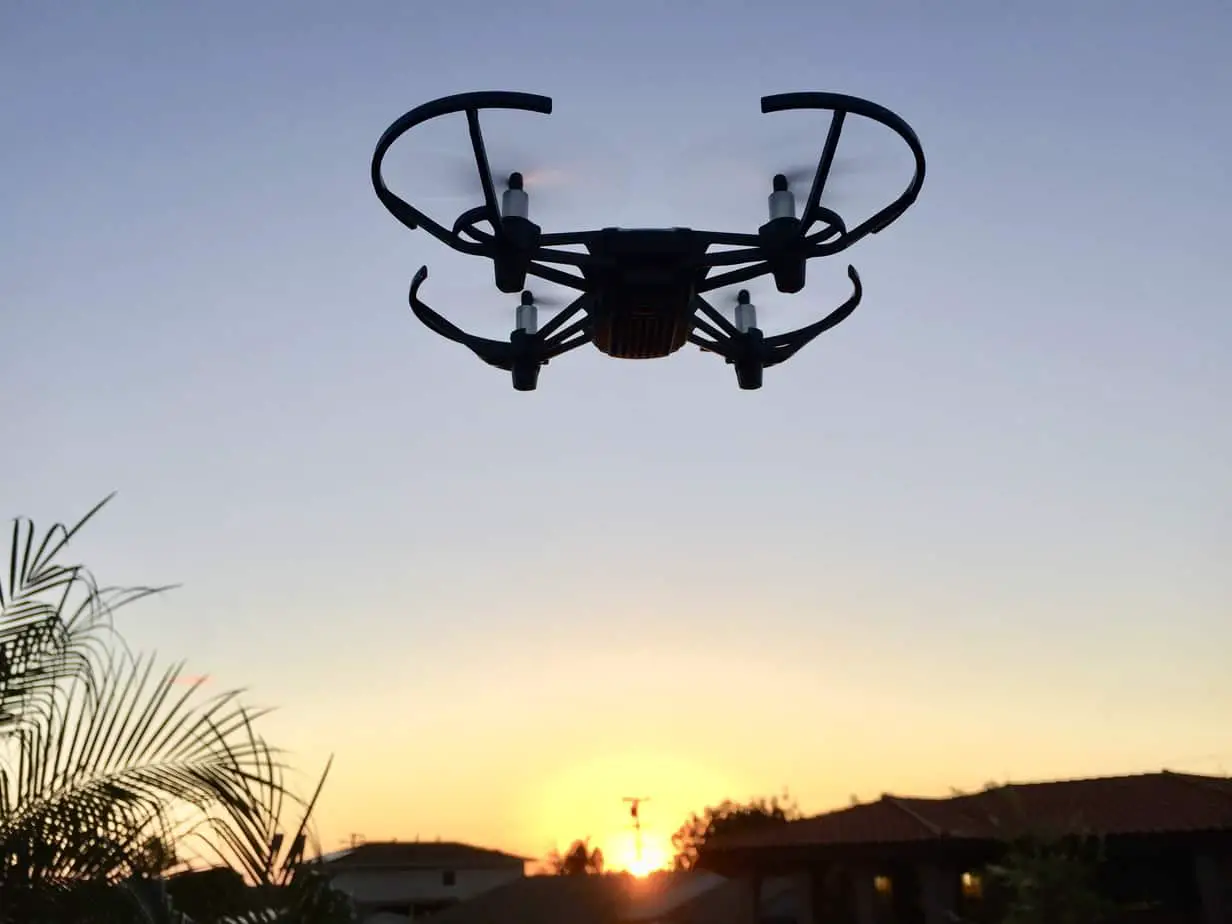
In flight

Great and fair review. I picked up a Ryze Tello at the local Walmart a few days ago. As indicated in your review, I too have had WiFi signal (i.e. Range) issues. Other than that I’ve enjoyed playing with this new drone.
Hey Michael, thanks for the feedback! Yea I’ve been a bit bummed about periodic Wi-Fi issues. Just last night I was showing my 3 year old niece the Tello’s “Flip Mode” and after one of the flips the drone proceeded to fly into a nearby wall instead of stabilizing. Odd. Fortunately, durability seems to be one of its strong suits. Do you think you’ll pickup a bluetooth controller?
I do plan to find a Bluetooth controller, as soon as one is identified for use with Android.
You’d think that DJI or Ryze would have tested the Bluetooth controllers that are compatible with both Apple and Android devices before releasing the Tello. I’ll let you know if I hear of one with good feedback for Android.
Hi there! I bought a Tello about a month ago and i’m really pissed off about few things..My intention is not to troll but simply describe my experience in hope that i will get some answers about the problems i’ve encountered..I mean i bought Tello because everybody i know that owns a drone reccomended it to me as a beginner drone and best 4 the money..
Problem 1) whenever i try to connect with the drone,it says can’t find connection or something in that context and yet when i enter my Tello app i am connected to the drone…
Problem 2)Whenever i try the 8D flip,it does some random stunt and then it flies vertically as high as it can without my comand and its a fight bring in it back..The wind may blow him away from connectivity range and i’m wondering how i havent lost it so far…Btw i fly it with my phone..This happens always when i try the 8d flip… I once borrowed a controller from a fried and the control was so much better..I mean it has no comparrison flying it with a phone and a conroller…
I want to buy 1 but i’m afraid i’ll just pend more money on a device that is susspicious at best…And there’s the lag…Bumped it a few times because of the lag..
Problem 3) Don’t know what exactly was the problem but while trying some of the tunt options,the drone can get verry high on its own and it falls like a stone from high altitude..I have no control whatsoever during the fall..I try to press the ,,UP” swipe,so i can ease the landing but with no success..BTW i was flying it around 18:30-19:00 almost at sunset…But the visibillity was not bad at all..It wasn’t darkly at all.
Problem 4) Short battery life… i fly it 6-7 min max….I read online that if you take the propeller guards out,you’ll get wef minutes more..Mabye 10…Witch is less than advertised..
I rlly enjoyed while i was flying it with the ,,controller” and the ,,signal booster” ( the 2 items which you obviously can’t fly your Tello without) but so far,flying it as it is it’s a dissapointment..
Please tell me if you encountered some of theese problem and how to fix them,because i rlly like to keep flying it..
P.S. Oh and one more thing: did all of this happens because i fly it in a poppulated place where everybody has internet rooters (hence the problems) or is it meant to be flown somewhere less poppulated? Srry for my my lack of understanding beacause obviously,i’m a newby in the drone field but i desperately need answers for the things i’ve mentioned..
Or simply,mabye i’ve been sold a bad drone :mabye used before) and i should just return it…?
Srry for the long stat but thanks to any1 who can answer my questions!
Have a nice day!
Hey Mario, thanks for the comment! I’ll do my best to answer your questions.
1. Have you tried connecting to the drone using different devices? Try toggling the Wi-Fi on/off on your mobile device to see if that helps.
2. What you’re describing definitely does not sound normal for the 8D flips. The Tello should only rise about a foot to perform the flip then return to its original height.
3. The drone should definitely not drop suddenly like that. My Tello has never done that before.
4. I’ve had my Tello since they first came out and I just did a flight time test today. Mine flew for 9 minutes with the prop guards on. 6-7 is pretty short.
You may be getting interference from routers in the area, but it sounds to me like you may have a defective Tello 🙁
Is your Tello on the current firmware update?
Have you tried deleting and reinstalling the Tello app?
Having a controller and a signal booster certainly enhances the flying experience, but the stock Tello should perform better than what you described to me.
What a bummer that you’re having these issues!
-Trevor
Thx 4 replying Trevor! Yes i’ve tried it once with my friend’s phone,controller and signal booster.It flew perfectly despite the short flight time 5-6min.. We tried every stunt available and it preformed as it should..Even the 8D flip..I know what it should suppose to look like..But all this with the controller..After that,then i switched to my phone all the same problems occur again… I loose picture on my screen after 10-15 meteres max…. I returned the drone to the store,with a hope that they’ll send me a new 1 or at least fix it…
The drone i bought was definitely used before and the package was opened..There were a lot of signs pointing to that but i didn’t had the time to check it out when i bought it…I bought it for 150euros,despite being 100$ in the USA…. People cant find a reliable store about electronics or stuff like theese,at least in my country..They always try to sell you some used crap as new and overpricing it at the same time….But nvm…
P.S.I have Samsung J 7 which i think is suitable enough device for the Tello….
Wow, what a bummer man. May I ask what country you’re in? Is there any way you can purchase one on the internet and have it shipped?
Tello is an amazing starter drone , I got one for my daughter at Xmas and was amazing how helped us to understand drones.
Then we got 2 more batteries and a case , a charger and Nimbus Controller and PUM! works great,
After few months I got my DJI Spark Fly More Combo and my Mavic Air is coming soon for sure.
Hey Franco,
I agree! Have you tried a range extender with the Tello? The controller and range extender made the Tello so much more fun to fly for me.
-Trevor